Authentication
Catalytic SDK requests are authenticated using Access Tokens. The easiest way to create a new Access Token, or to manage your existing Access Tokens is from your Account page in the Catalytic Web App. However, you can also manage your tokens from the SDK itself. Here you will find a quick guide to managing your Access Tokens in the web app or with the SDK.
Creating your first token
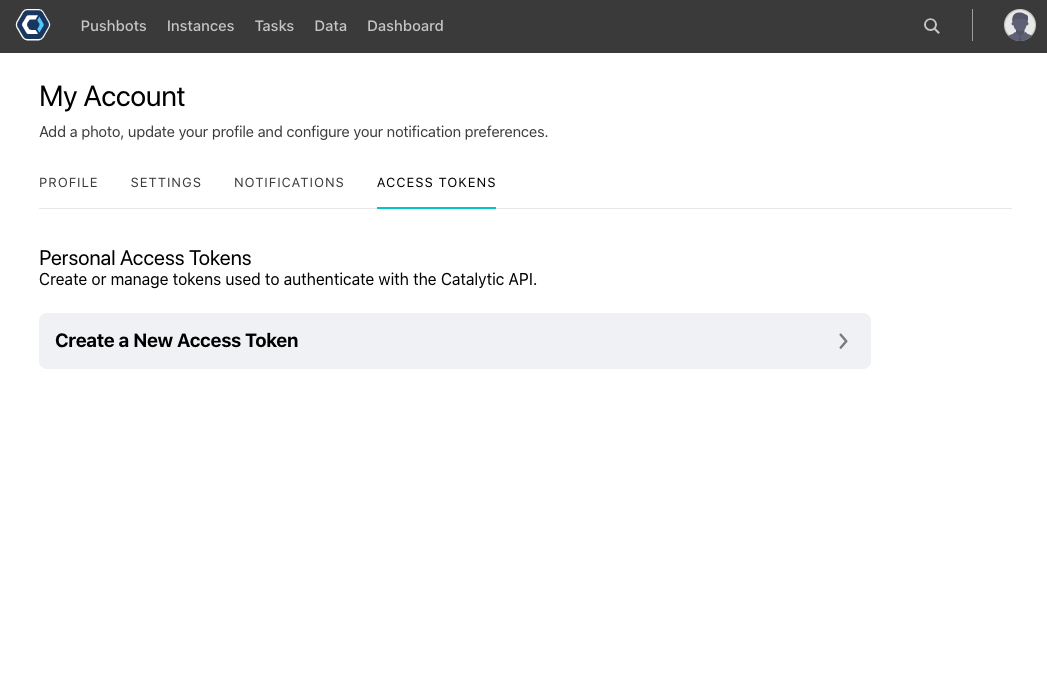
The easiest way to create a new Access Token is to go to your Account page in the Catalytic Web App. You can view and manage all of your Access Tokens from that screen.

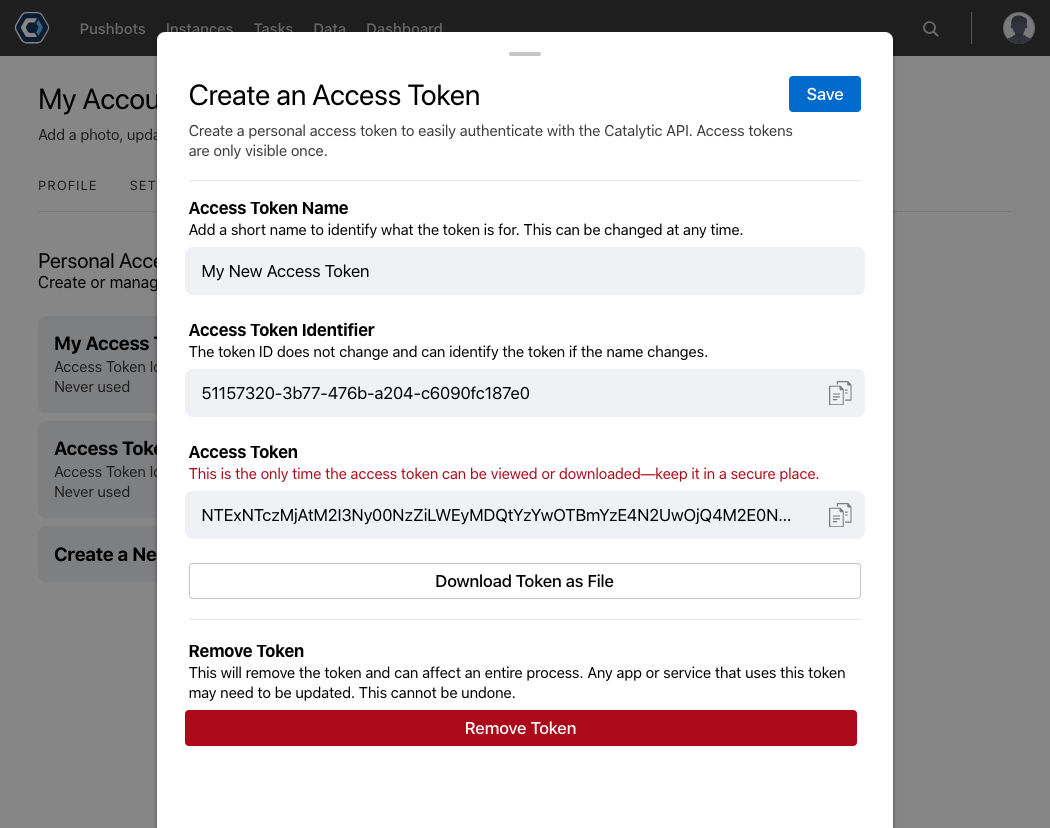
As shown in the screenshot below, when you create a new Access Token, you can give it a nickname that represents where it will be used from.

When you create your Access Token, you will have a chance to copy or download the serialized Access Token string. This will be the only time you can get your Access Token, so you must be sure to download or copy it before closing this window. Besides some metadata, Catalytic only stores the hash of your Access Token's secret. This ensures that even with a decrypted copy of our database, an attacker could not authenticate with your token through the SDK.
You now have a few options for configuring the SDK to use that token.
- Environment Variable
- Default Access Token File
- Named Access Token File
- Custom storage
- Hard coded
Environment Variable
First, copy your token string by clicking on the Copy button, then save the copied value as the CATALYTIC_TOKEN environment variable.
Default Access Token File
First, download your token by clicking on the Download button, then save the file as $HOME/.catalytic/tokens/default
Using your Default Access Token
You can use an Access Token set in the environment or the default Access Token file by passing AccessToken.Default into the SDK.Client constructor. AccessToken.Default will first try to load the Access Token from the CATALYTIC_TOKEN environment variable. If that is not set, it will try to read them from $HOME/.catalytic/tokens/default
var catalytic = new Catalytic.SDK.CatalyticClient(AccessToken.Default);
Named Access Token File
If you want to use multiple Access Tokens from within the same application, or use different Access Tokens with different applications running under the same user account on your machine, you can name your saved Access Tokens and load them dynamically.
Simply name your downloaded Access Token file something other than default when you save it to your $HOME/.catalytic/tokens/ directory. You can then pass that name to AccessToken.FromFile(name).
For example, you may want to run your application in both your production and UAT teams. If you saved your UAT Access Token to $HOME/.catalytic/tokens/uat, you could load both like this:
var catalyticUat = new Catalytic.SDK.CatalyticClient(AccessToken.FromFile("uat"));
var catalyticProd = new Catalytic.SDK.CatalyticClient(AccessToken.FromFile("prod");
You don't have to use the default location for your Access Token files. If you want to use some other path, you can pass an optional DirectoryInfo containing the location for your Access Token files to the AccessToken.FromFile call, like this:
var accessToken = AccessToken.FromFile("my-token", new DirectoryInfo("path/to/token/directory"));
var catalytic = new Catalytic.SDK.CatalyticClient(accessToken);
Custom Storage or Hard-Coded
You can also store your tokens anywhere you like as long as you can load them into a string in your application. For example, you may want to store your Access Token in a Secrets Vault. Simply save the copied token string into your storage system. Then in your application, retrieve that string from your storage system and initialize your Access Token with AccessToken.FromString(token). You can also simply hard-code your token string, though that's not recommended for most production scenarios. For example:
var token = "YOUR_SERIALIZED_ACCESS_TOKEN_STRING";
var catalytic = new Catalytic.SDK.CatalyticClient(AccessToken.FromString(token));

// Alternatively, you can set the serialized Access Token string directly on a constructed CatalyticClient instance
catalytic.AccessToken = token;
Access Token Lifecycles
Once you have several Access Tokens, using a descriptive name will make it easier to know which token you want to revoke. For example, you might have one token for development named "MacBook Pro 2016" and another for production named "AWS Production". If you later replace your laptop, you know you can safely revoke your "MacBook Pro 2016" token without risk of deleting the token you use for production. Your tokens never expire, so be sure to revoke any that are no longer in use.
Creating Access Tokens from the SDK
In addition to creating and managing Access Tokens in the Catalytic Web App, you can create and manage Access Tokens through the Catalytic SDK. Creating and managing Access Tokens is done through the AccessTokens client as shown in the examples below. In addition to viewing and revoking existing Access Tokens, the SDK provides two methods to create new Access Tokens:
Create a new Access Token using your email and password
Unless your team is configured with SSO (in which case, see the note below), you can use your email and password to create a new Access Token which you can then use for all subsequent SDK requests.
/*
 * This example demonstrates creating a new Access Token using your
 * email and password
 */
using Catalytic.Sdk.Entities;

namespace Catalytic.Sdk.Examples
{
    class Program
    {
        static void Main(string[] args)
        {
            var catalytic = new Catalytic.Sdk.CatalyticClient();
            var accessToken = catalytic.AccessTokens.Create(
                "your-team",
                "your-email",
                "your-password");
            accessToken.SaveToFile("default");
            catalytic.AccessToken = accessToken;

            // You are now authenticated and ready to use the Catalytic SDK
            // The above only needs to be done once. Now that your Access Token
            // is saved as the default Access Token, you can configure the SDK
            // to use those:
            catalytic = new Catalytic.Sdk.Client(AccessToken.Default);
        }
    }
}
Does your team use SSO?
If your Catalytic team has SSO enabled, you cannot use the email and password method to create a new Access Token since you do not have a password enabled for your Catalytic login. Instead you must use the
CreateWithWebApprovalFlowmethod below.
Create a new Access Token using the web approval flow
For interactive applications, rather than passing your email and password to authenticate your request for an Access Token, you can instead request an Access Token through the SDK, and approve it interactively by logging into your Catalytic account in a web browser. This is similar to OAuth flows where the user is redirected to their identity provider to approve the request.
/*
 * This example demonstrates creating a new Access Token using tbe
 * web approval flow
 */
using Catalytic.Sdk.Entities;

namespace Catalytic.Sdk.Examples
{
    class Program
    {
        static void Main(string[] args)
        {
            var catalytic = new Catalytic.Sdk.CatalyticClient();
            var accessToken = catalytic.AccessTokens.CreateWithWebApprovalFlow(
                "your-team");
            var approvalUrl = catalytic.AccessTokens.GetApprovalUrl(accessToken);
            catalytic.AccessTokens.OpenUrl(approvalUrl);
            catalytic.AccessTokens.WaitForApproval(accessToken);
            accessToken.SaveToFile("default");
            catalytic.AccessToken = accessToken;
            // You are now authenticated and ready to use the Catalytic SDK
            // The above only needs to be done once. Now that your Access Token
            // is saved as the default Access Token, you can configure the SDK
            // to use those:
            catalytic = new Catalytic.Sdk.Client(AccessToken.Default);
        }
    }
}
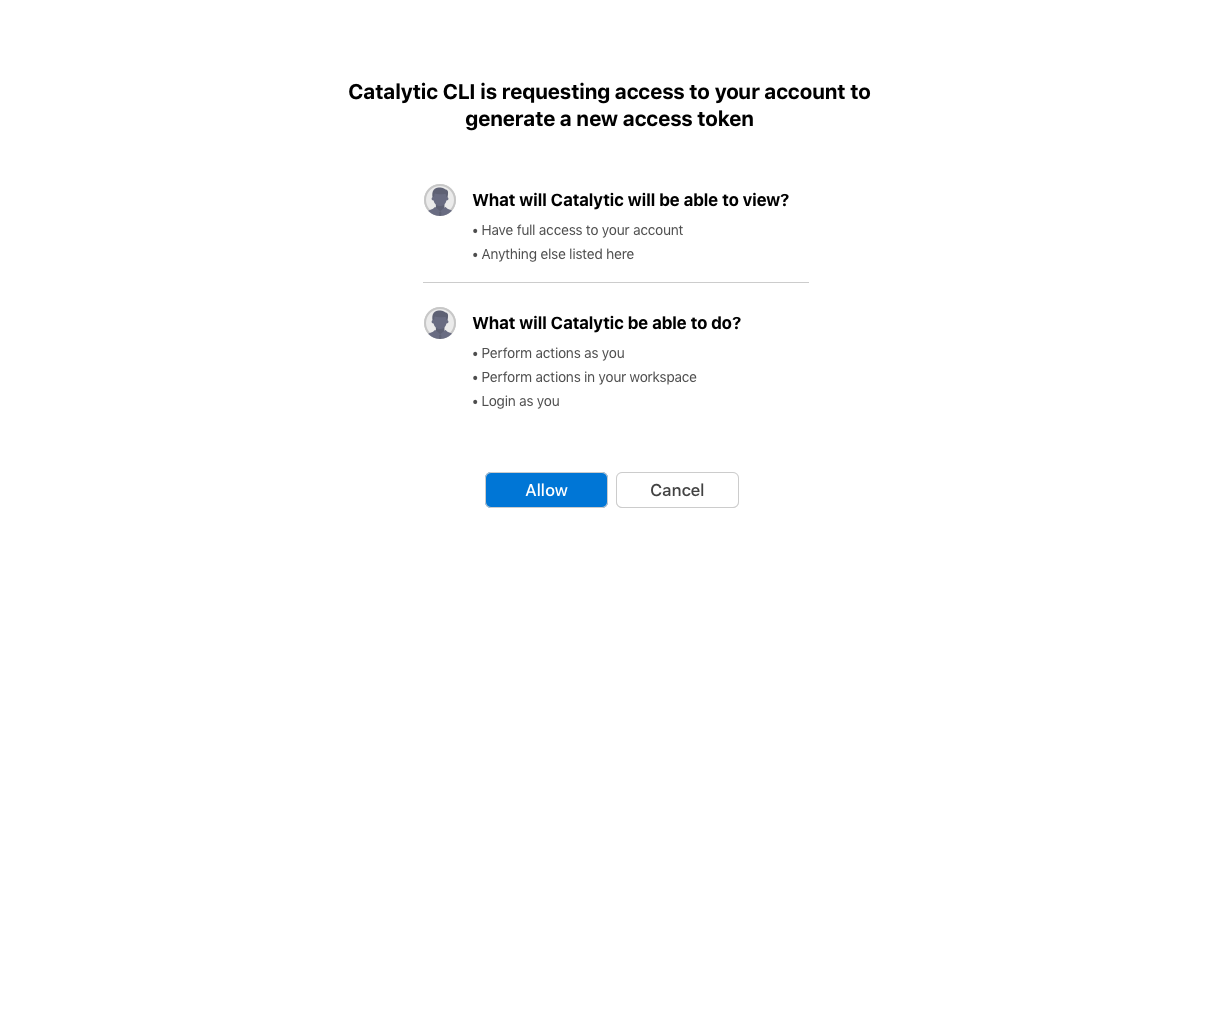
When the approval URL is opened in the browser via the catalytic.AccessTokens.OpenUrl(approvalUrl) call, you will first be asked to log in if you are not already logged in to your Catalytic team. Once you are logged in, you will see a screen like the following, asking you to approve of the Access Token request.

Note that if your application is already running in the browser, instead of calling catalytic.AccessTokens.OpenUrl(approvalUrl), you should take the approvalUrl and direct the user there.
The catalytic.AccessTokens.WaitForApproval(accessToken) call will block until the user has approved or canceled the request. If the request is canceled, the WaitForApproval will throw an UnauthorizedException.
Updated almost 4 years ago